
I had seen several posts on Pinterest about homemade curtains, and they did not look too hard. So I pulled out my sewing machine and decided to give it a try and see what I could do. Before you start laughing hysterically, you should know that the end result wasn't too bad and you might not guess that I broke into tears and ended up on the phone several times with my mom throughout the process.
Also, I was completely winging it most of the process. Mom walked me though what she could via long-distance, and the rest I made up. I don't know what the different feet are for on the sewing machine, and I haven't a clue what bias tape is really used for. I was doing good to accomplish a straight stitch, and I use the term "straight" very loosely. I assure you, I was completely sober through the whole process, in spite of my crooked stitches.
So to start the process, I gathered my materials: 2 yards of 44" wide fabric, 2 package of extra-wide double-fold bias tape, matching thread, and wide satin ribbon. I will note here I ended up replacing my original ribbon choice with a wider version at the end of the process.

I opened up the bias tape and pinned it down along the edges sides and bottom of the material. (I only made one wide panel for the window.) I stitched it down, and the folded it back up and pinned down again. Then, I took made a final seam that stitched down the bias tape.


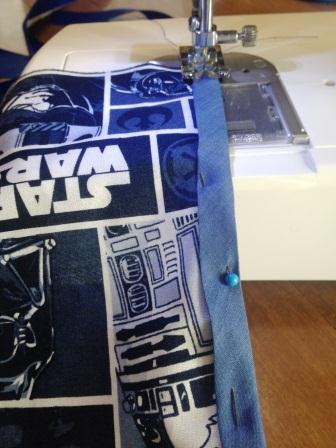

This sounds easy, but it took me several tries and phone calls to figure out what I needed to do. My original thought was that I would just fold over the bias tape and stitch it down, but the bias tape was not wide enough and I could not get the material to stay inside it, even with pins. Again, I am going to stress that I am a complete sewing novice, and am making all of this up as I go along.
After I got all the bias tape sewed down on the sides and bottom, I tackled the top. My original thought was that I would fold the ribbon in half and stitch it down on the bottom edge to the top of the material to make a sleeve for the curtain rod. Sounds simple enough, right? Well, the ribbon kept moving around and would buckle and bubble, and would not sew down flat, even when I had it pinned. I ended up folding the ribbon in half and then ironing it to make a seam. Then, I stitched the back side of the ribbon down to the back side of the material. Then I folded the front side down, pinned it, and stitched it down by hand.

I am pleased with the end results. You can't really see all of my little mistakes, especially once I put the curtain on the rod. If I can do it, anyone can! I hope Little Man likes the new curtains. With most little kids, you would not have to worry about them noticing the small details. With Little Man though, he will notice the fact that one side is slightly longer than the other and that some of the seams aren't completely straight.


And he doesn't understand that social convention dictates that he should probably keep those observations to himself. Last time I mended something for him, he noted that I should probably take it to Grandma and let he do it, because he is good at sewing and knows what she is doing.
So here's hoping that he doesn't notice the flaws, because I might end up in tears having another Emo Marie moment!
No comments:
Post a Comment